Finally, you have that dream camera with RED color science. Who cares that 15 minute or so video fills up 1TB CFExpress card? Come on, we shoot everything in R3D Raw. CFExpress cards have come down in price. But before we start shooting RAW (or Log for that matter), we need to load LUTs on the camera and use video assist function to see how our video will look like on Nikon ZR’s gorgeous screen.
So far, so good. But here comes a problem. I’m not able to import LUTs. None of them. I’ve downloaded RED’s combined LUTs. I even tried them in Final Cut Pro - they look gorgeous. Now I want them on the camera for video assist but alas.
As a software engineer with 20+ year of experience my primary debugging instincts come alive. Let’s start debugging this problem.
Potential Issue - Wrong Folder
You see, you can’t just throw the LUTs on a memory card and expect your Nikon ZR to pick them up. You have to copy the LUTs to a specially designated folder.
Nikon ZR is smart enough to import LUTs both from the CFExpress card and from the micro SD card. Insert the card into your computer or card reader and open the Nikon folder. Within that folder create another folder named LUTS and copy the LUTs into that folder. Done.
Bring the card back into the camera. Let’s import the LUTs. Not so fast. The camera still cannot find the LUTs. Let me guess. You’re using a Mac. Bingo.
Potential Issue - Mac
Mac computers while are fantastic have certain quirks. Or to be more precise, do certain things in “quirky” ways. Mac likes to create additional, hidden files for its own purpose. When you open a storage in Mac Finder you normally don’t see those files and that’s good. Because those files are for the MacOS itself. However, it turns that your Nikon ZR doesn’t like those files. This is the root cause of the problem. So, now we just need to delete those files.
If you are a long time Mac user, you probably know that in Finder you can show hidden files by using Cmd-Shift-dot command. So basically you push the Cmd key (Apple button), the Shift key and . key simultaneously. Ok, you’ve done that, you go to microSD/Nikon/LUTS folder but you see only the LUTs you copied, nothing extra. That’s right. This way of revealing the hidden files doesn’t work in this particular case.
So How do We Fix It?
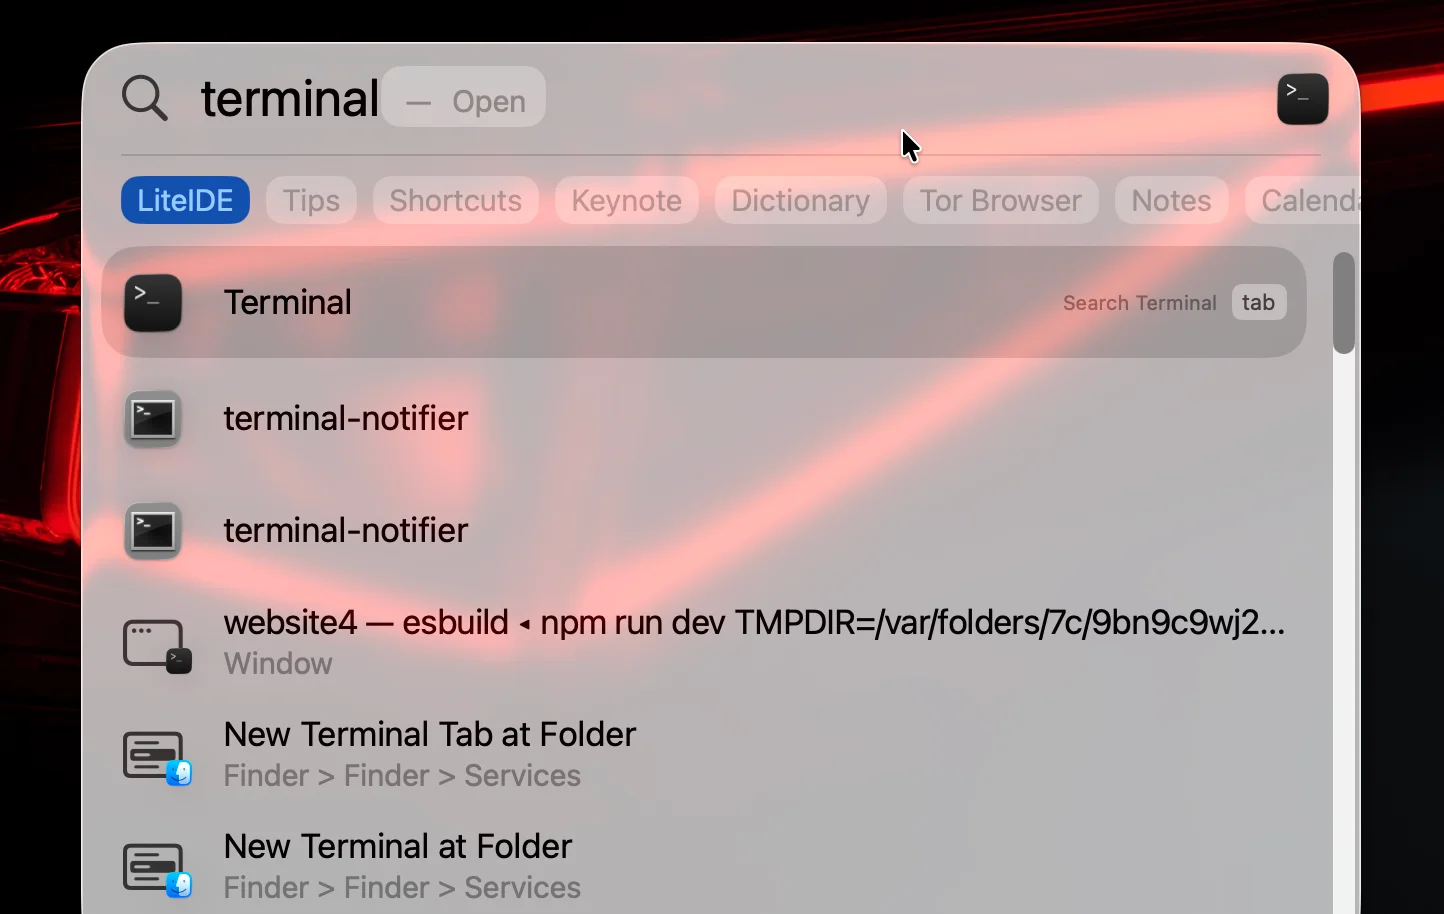
The solution is not a single click and requires firing up Terminal. It might sound scary but no worries. It’s easier than you might think. Here’s a step-by-step instruction.
- Hit Cmd-Spacebar and type “terminal” and hit Enter.
-
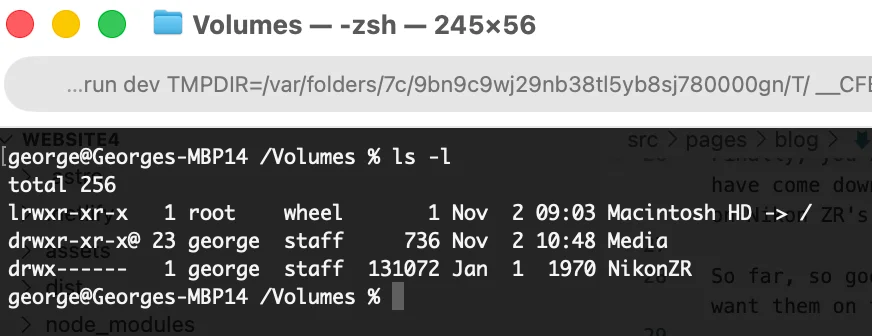
Type cd /Volumes and hit Enter.
-
Type ls -l to get the list of storage and look for your microSD or CFExpress card. In my case it’s named NikonZR.
- Type cd YOUR_CARD_NAME/Nikon/LUTS and replace YOUR_CARD_NAME with the actual name of your card. In my case, the command would be cd NikonZR/Nikon/LUTS and hit Enter.
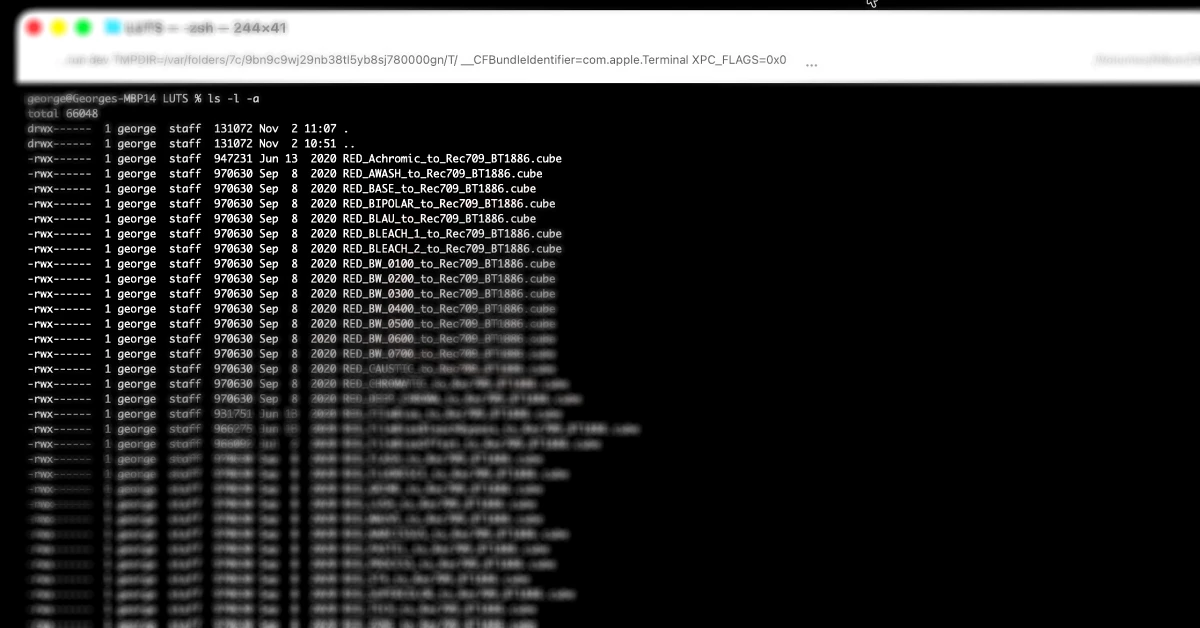
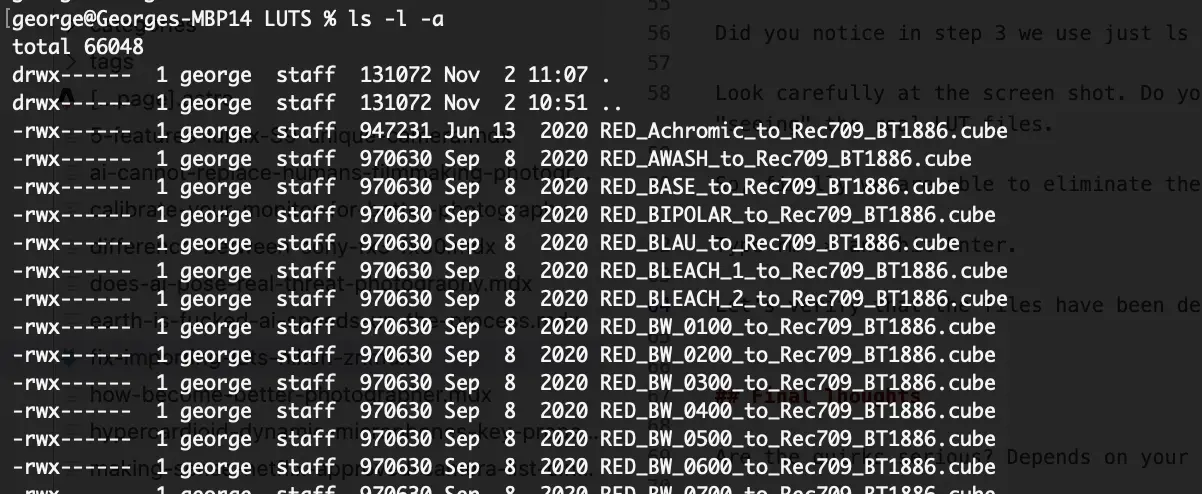
- Type ls -l -a and hit Enter.
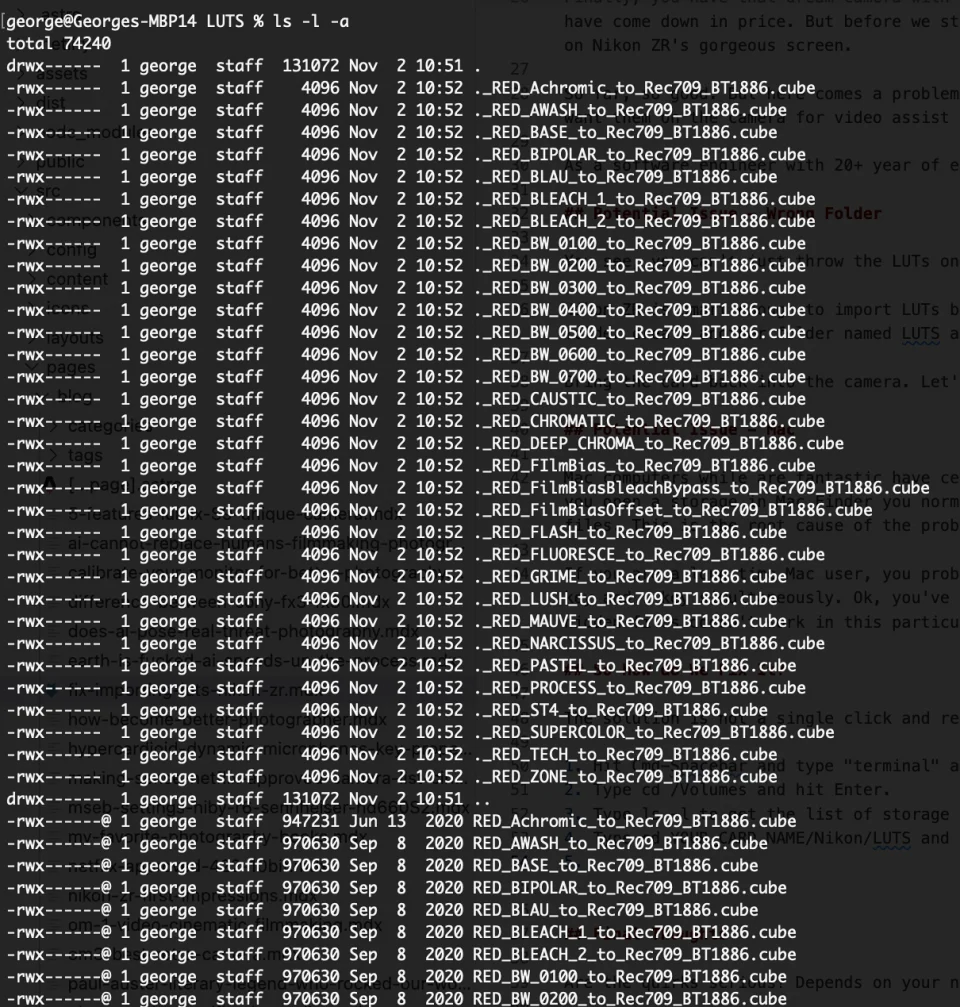
Did you notice in step 3 we use just ls -l command whereas here we use ls -l -a command. This -a is what does the magic as it reveals those suckers.
Look carefully at the screen shot. Do you see the list of LUTs doubled? More precisely, the hidden ones start with a dot. This is what confuses your Nikon ZR and prevents it from “seeing” the real LUT files.
So, finally we are able to eliminate the root cause and fix the problem. We just need to delete those hidden files. You just need one command:
Type rm .* and hit Enter.
Let’s verify that the files have been deleted. Type ls -l -a and hit Enter. Observe that those weird files are gone and we are left with the actual LUTs only.
Final Thoughts
I hope this will save you time with fixing the issue to import LUTs on your Nikon ZR. Yes, it requires firing up Terminal and typing a couple commands, but the effort is worth it. Id you find this too complicated, another option would be to fix this on a Windows computer. If you have access to a Windows machine, you can just insert the card there and remove those files without messing with the MacOS terminal. Either way, the key is to remove those extraneous files.